Samouczek dotyczący kontrolera robaków 3D dla Unity
W tym samouczku pokażę, jak stworzyć prosty kontroler robaka w Unity, zainspirowany serią poradników tworzenia gier dla początkujących TornadoTwins.
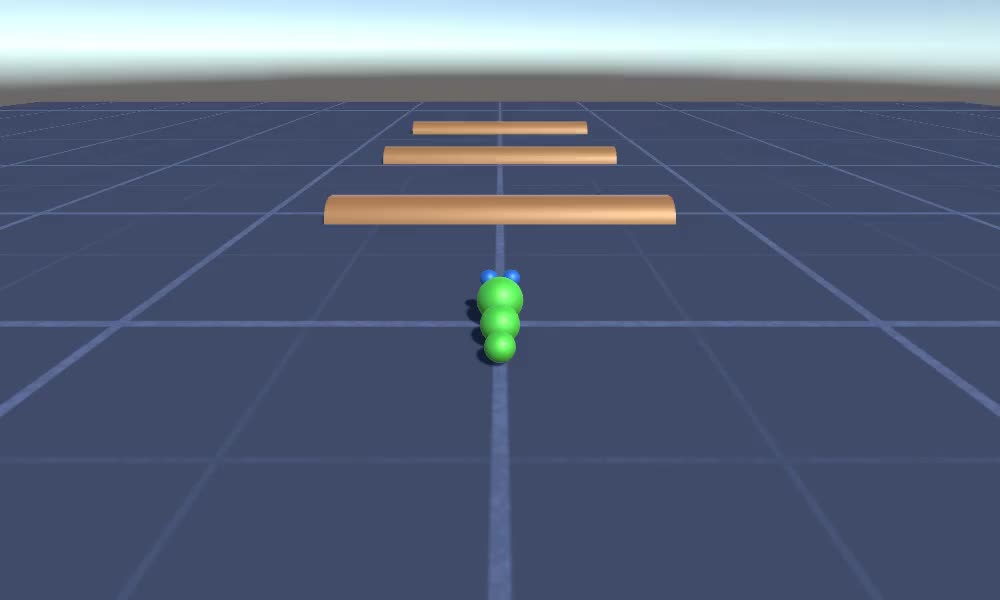
Kontroler robaka będzie się ślizgał z płynnym efektem podążania za ogonem i będzie mógł skakać.
Skrypty zawarte w tym samouczku zostały oryginalnie napisane w języku JavaScript (inaczej UnityScript), który nie jest już obsługiwany, dlatego udostępnię alternatywę C#.
Aby utworzyć kontroler robaka w Unity będziemy potrzebować:
- Utwórz niezbędne skrypty
- Stwórz postać robaka
- Przypisz skrypty do postaci
Krok 1: Utwórz wszystkie niezbędne skrypty
Zacznijmy od stworzenia wszystkich skryptów, które będą potrzebne do skonfigurowania kontrolera robaka:
- Utwórz nowy skrypt, nadaj mu nazwę "SC_WormController" i wklej w nim poniższy kod:
SC_WormController.cs
using System.Collections;
using System.Collections.Generic;
using UnityEngine;

[RequireComponent(typeof(CharacterController))]
public class SC_WormController : MonoBehaviour
{
    public float speed = 3.0f;
    public float rotateSpeed = 1.0f;
    public float jumpSpeed = 5.0f;
    public float gravity = 9.8f;

    CharacterController controller;
    Vector3 moveDirection;

    // Start is called before the first frame update
    void Start()
    {
        controller = GetComponent<CharacterController>();
    }

    // Update is called once per frame
    void Update()
    {
        // Rotate around y - axis
        transform.Rotate(0, Input.GetAxis("Horizontal") * rotateSpeed, 0);

        // Move forward / backward
        Vector3 forward = transform.TransformDirection(Vector3.forward);
        float curSpeed = speed * Input.GetAxis("Vertical");
        float movementDirectionY = moveDirection.y;
        moveDirection = forward * curSpeed;

        // Jumping
        if (Input.GetButtonDown("Jump") && controller.isGrounded)
        {
            moveDirection.y = jumpSpeed;
        }
        else
        {
            moveDirection.y = movementDirectionY;
        }

        // Apply gravity. Gravity is multiplied by deltaTime twice (once here, and once below
        // when the moveDirection is multiplied by deltaTime). This is because gravity should be applied
        // as an acceleration (ms^-2)
        if (!controller.isGrounded)
        {
            moveDirection.y -= gravity * Time.deltaTime;
        }

        // Move the controller
        controller.Move(moveDirection * Time.deltaTime);
    }
}- Utwórz nowy skrypt, nazwij go "SC_CameraFollow" i wklej w nim poniższy kod:
SC_CameraFollow.cs
using System.Collections;
using System.Collections.Generic;
using UnityEngine;

public class SC_CameraFollow : MonoBehaviour
{
    /*
    This camera smoothers out rotation around the y-axis and height.
    Horizontal Distance to the target is always fixed.

    There are many different ways to smooth the rotation but doing it this way gives you a lot of control over how the camera behaves.

    For every of those smoothed values we calculate the wanted value and the current value.
    Then we smooth it using the Lerp function.
    Then we apply the smoothed values to the transform's position.
    */

    // The target we are following
    public Transform target;
    // The distance in the x-z plane to the target
    public float distance = 10.0f;
    // the height we want the camera to be above the target
    public float height = 5.0f;
    // How much we
    public float heightDamping = 2.0f;
    public float rotationDamping = 3.0f;

    void LateUpdate()
    {
        // Early out if we don't have a target
        if (!target)
            return;

        // Calculate the current rotation angles
        float wantedRotationAngle = target.eulerAngles.y;
        float wantedHeight = target.position.y + height;
        float currentRotationAngle = transform.eulerAngles.y;
        float currentHeight = transform.position.y;

        // Damp the rotation around the y-axis
        currentRotationAngle = Mathf.LerpAngle(currentRotationAngle, wantedRotationAngle, rotationDamping * Time.deltaTime);

        // Damp the height
        currentHeight = Mathf.Lerp(currentHeight, wantedHeight, heightDamping * Time.deltaTime);

        // Convert the angle into a rotation
        Quaternion currentRotation = Quaternion.Euler(0, currentRotationAngle, 0);

        // Set the position of the camera on the x-z plane to:
        // distance meters behind the target
        transform.position = target.position;
        transform.position -= currentRotation * Vector3.forward * distance;

        // Set the height of the camera
        transform.position = new Vector3(transform.position.x, currentHeight, transform.position.z);

        // Always look at the target
        transform.LookAt(target);
    }
}- Utwórz nowy skrypt, nazwij go "SC_SmoothFollow" i wklej w nim poniższy kod:
SC_SmoothFollow.cs
using System.Collections;
using System.Collections.Generic;
using UnityEngine;

public class SC_SmoothFollow : MonoBehaviour
{
    // The target we are following
    public Transform target;
    // The distance in the x-z plane to the target
    public float distance = 10.0f;
    // the height we want the camera to be above the target
    public float height = 5.0f;
    // How much we
    public float heightDamping = 2.0f;
    public float rotationDamping = 3.0f;

    // Start is called before the first frame update
    void Start()
    {
        if (!target) return;

        transform.LookAt(target);
    }

    void LateUpdate()
    {
        // Early out if we don't have a target
        if (!target) return;

        // Calculate the current rotation angles
        float wantedRotationAngle = target.eulerAngles.y;
        float wantedHeight = target.position.y + height;

        float currentRotationAngle = transform.eulerAngles.y;
        float currentHeight = transform.position.y;

        // Damp the rotation around the y-axis
        currentRotationAngle = Mathf.LerpAngle(currentRotationAngle, wantedRotationAngle, rotationDamping * Time.deltaTime);

        // Damp the height
        currentHeight = Mathf.Lerp(currentHeight, wantedHeight, heightDamping * Time.deltaTime);

        // Convert the angle into a rotation
        var currentRotation = Quaternion.Euler(0, currentRotationAngle, 0);

        // Set the position of the camera on the x-z plane to:
        // distance meters behind the target
        transform.position = target.position;
        transform.position -= currentRotation * Vector3.forward * distance;

        // Set the height of the camera
        transform.position = new Vector3(transform.position.x, currentHeight, transform.position.z);

        // Always look at the target
        transform.LookAt(target);
    }
}
Krok 2: Utwórz postać robaka
Następnym krokiem jest utworzenie postaci robaka:
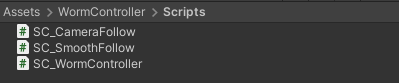
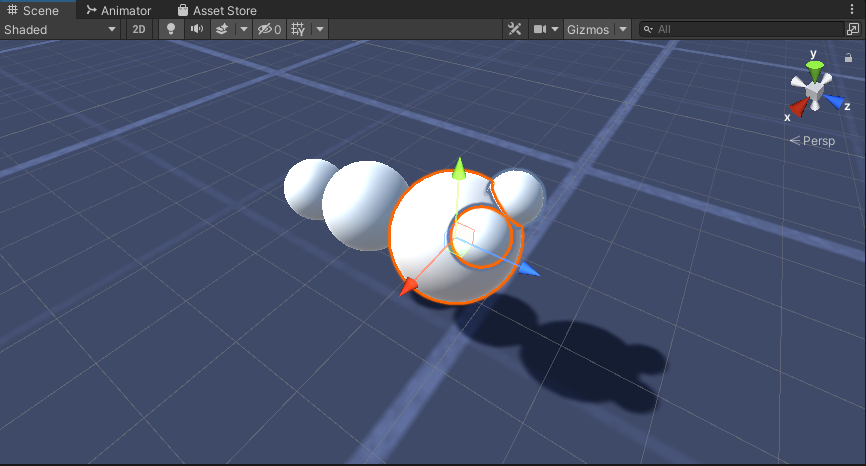
- Utwórz nową Sferę (GameObject -> Obiekt 3D -> Sfera) zmień jej położenie na (0, 0, 0), usuń jej komponent SphereCollider i zmień jego nazwę na "Worm"
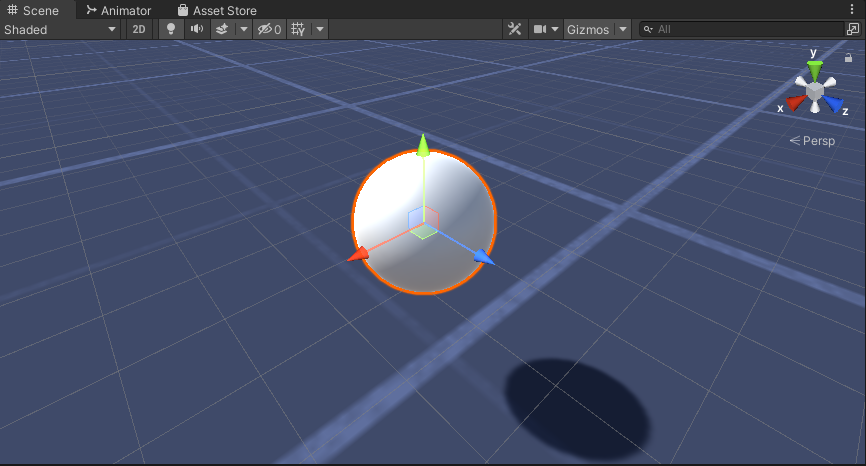
- Powiel kulę "Worm", zmień jej nazwę na "BodyPart1", zmień jej położenie na (0, -0.1, -0.9) i zmień jej skalę na (0.8, 0.8, 0.8)
- Zduplikuj ponownie kulę "Worm", zmień jej nazwę na "BodyPart2", zmień jej położenie na (0, -0.2, -1.6) i zmień jej skalę na (0.6, 0.6, 0.6)
- Kliknij prawym przyciskiem myszy obiekt "Worm" -> Utwórz pusty i zmień nazwę nowo utworzonego obiektu na "Eyes"
- Powiel kulę "BodyPart2", zmień jej nazwę na "Eye" i przenieś ją do obiektu "Eyes", zmień jej położenie na (-0.24, 0.353, 0.324) i zmień jej skalę na (0.4, 0.4, 0.4)
- Powiel kulę "Eye" i zmień jej położenie X na 0,24
- Do wizualizacji możesz stworzyć kilka materiałów, np. zielony dla ciała i niebieski dla oczu.
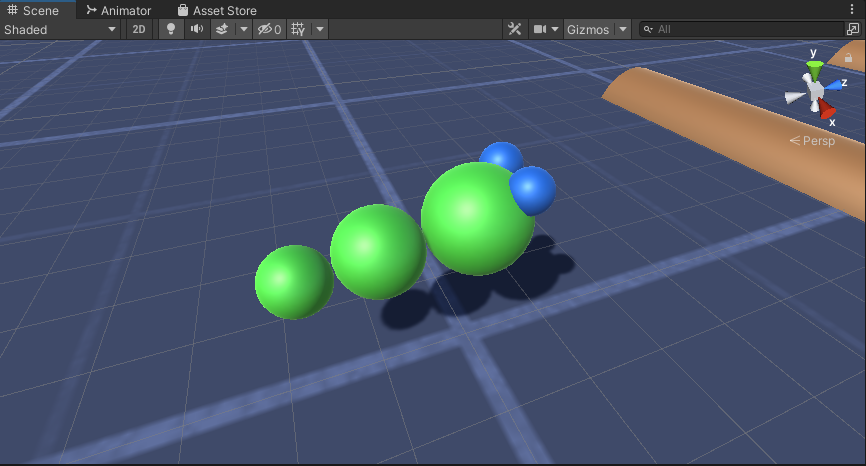
Postać Robaka jest gotowa.
Krok 3: Skonfiguruj kontroler robaka
Ostatnim krokiem jest przypisanie skryptów:
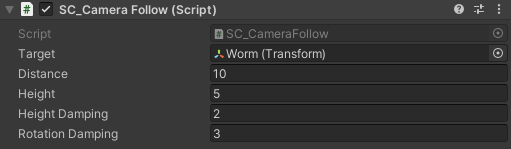
- Dołącz skrypt SC_CameraFollow do obiektu Main Camera i przypisz "Worm" Sphere do zmiennej docelowej:
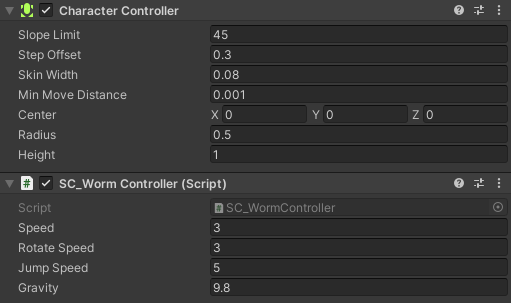
- Dołącz skrypt SC_WormController do sfery "Worm" (automatycznie doda kolejny komponent o nazwie CharacterController):
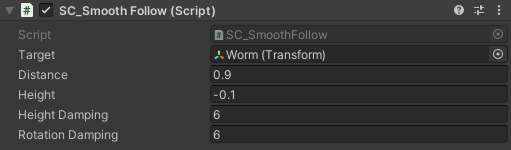
- Dołącz skrypt SC_SmoothFollow do sfery "BodyPart1" i ustaw jego wartości takie same jak na zrzucie ekranu poniżej:
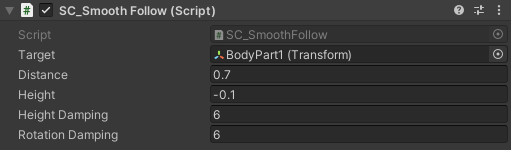
- Dołącz skrypt SC_SmoothFollow do sfery "BodyPart2" i ustaw jego wartości takie same jak na zrzucie ekranu poniżej:
Kontroler jest teraz gotowy, użyj W, A, S i D, aby się poruszać, i spacji, aby skakać.
Pakiet źródłowy Unity jest dostępny poniżej.